
React JS - Beginners


React JS

React is an open-source JavaScript library for building user interfaces or UI components.
It was created at Facebook and open-sourced in March of 2013. It is used on social platforms like Instagram, Facebook, Twitter. And It is used on content delivery platforms like NetFlix, Spotify.


Beyond Web applications, you can create native mobile applications using React Native.

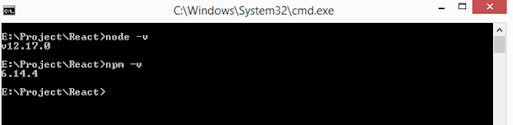
Check your system node and npm version. Node version should be greater than 8.10 and for npm, we need version 5.6.


Create a new React-app:

Command to create a new react app: npx create-react-app new-app

 To start the react app: npm start


Folder Structure:


package.json – It contains all the project dependencies.

src folder – It contains the files required to build the application

public folder – when we ready to build the app for production all the built files will be placed in the public folder.


Create a React element:

Elements are the building blocks of React apps. We can create a new element in the UI by using  React.createElement() and pass this to ReactDOM.render() which renders an element in the page.


ReactDOM.render() takes two arguments.

First – the element that we want to create

Second – where we want to render the element.

React.createElement() – takes three arguments

First – the name of the tag that we want to create,

Second – the properties of the element,

Third  - the children tag or it could be some text.

    import React from 'react';
    import ReactDOM from 'react-dom';
    import './index.css';


    ReactDOM.render(
     React.createElement('h1'null"Hello World"),
      document.getElementById('root')
    );


In the above code, we are creating the “h1” element and rendering it to the “root” element.


Where is the root element?

We can find it in the index.html file in the public folder.


In the React.createElement(), we can apply properties to the element as an object.


    ReactDOM.render(
     React.createElement('h1', {style: {color: "red" }}, "Hello World"),
      document.getElementById('root')
    );


Comments

Popular posts from this blog

Convert Base64 code to PDF file in Angular

Component.ts: import { DomSanitizer } from '@angular/platform-browser' ; base64Code = 'your base64 code ' ; byteCharacters : any ; pdfUrl : any ; constructor ( public sanitizer : DomSanitizer ) { } convertToPdf () { // tslint:disable-next-line:max-line-length this . byteCharacters = this . base64Code ; // atob() function decodes a string of data which has been encoded using base-64 encoding const byteCharacters = atob ( this . base64Code ); const byteNumbers = new Array ( byteCharacters . length ); for ( let i = 0 ; i < byteCharacters . length ; i ++) { byteNumbers [ i ] = byteCharacters . charCodeAt ( i ); } const byteArray = new Uint8Array ( byteNumbers ); const blob = new Blob ([ byteArray ], { 'type' : 'application/pdf' }); this . pdfUrl = URL . createObjectURL ( blob ); } Component.html: < embed [src] = "sanitizer.bypassSecurityTr

Observable, Subject , Behavior Subject using RxJS:

  Create an Observable using RxJS:   Import the Observable                                    import  {  Observable  }  from   'rxjs' ; The Observable execution deliver three types of values: "Next" - sends a value such as a Number, a String, an Object, etc. "Error - sends the Error or exception. "Complete" - does not send a value after the Complete                                             ngOnInit ():  void  {                    this . observable$  =  new   Observable ( subscriber   =>  {                      subscriber . next ( 1 );                      subscriber . next ( 2 );                      subscriber . next ( 3 );                      subscriber . complete ();  //Complete the subscribing here                      subscriber . next ( 4 );   // Value not send after complete                   });                    this . observable$ . subscribe ( value   =>  {                      console . log ( value );